7 Vital Chimney Repair Steps You Must Know
6 Apr 2024
Categories: Chimney Sweep
Tags: chimney repair procedure, chimney repair process, chimney repair stages, chimney repair steps,
Imagine a cozy evening by the fireplace, only to be disrupted by the realization that your chimney needs attention. Fear not! Our blog delves into the 7 vital chimney repair process steps you must know to navigate the intricacies of chimney repair seamlessly. The chimney repair steps typically involve inspection, assessment of damage, selecting appropriate repair methods, and finally, implementation by skilled professionals. Let’s embark on this journey together, demystifying chimney maintenance and repair in a way that empowers you to take charge of your chimney’s well-being.
Step 1: Identification of Chimney Damage
A well-maintained chimney is essential for the efficient and safe operation of your fireplace or heating system. Here are some indicators that can help homeowners identify chimney damage:
1. Visual Inspection
Take a closer look at your chimney for any visible cracks or gaps in the masonry or chimney flue. Look for any signs of deterioration, such as loose bricks or missing mortar. These visual cues often indicate that your chimney needs repair.
2. Water Leaks
Water leaks inside your home near the fireplace or chimney are a clear sign of chimney damage. Stains or dampness on the walls or ceiling, especially after rainfall, suggest a leaky chimney. Addressing these leaks promptly is crucial to prevent further water damage.
3. Damaged Chimney Cap or Crown
Inspect the chimney cap and crown. A damaged or missing chimney cap can lead to water penetration and animal entry, while a deteriorated chimney crown can allow water to seep into the chimney structure. Both issues require immediate repair.
4. Smoke Issues
If you notice an increase in smoke or a lingering smoky smell inside your home, it could indicate chimney damage. A damaged or blocked chimney flue can cause improper smoke ventilation, compromising indoor air quality.
5. Chimney Efflorescence
Efflorescence is white or grayish residue that appears on the exterior of the chimney. It occurs due to moisture penetration and leaching of salts from the masonry. Efflorescence is a clear indication of water damage and should be addressed promptly.
6. Soot Buildup
Excessive buildup of soot inside the chimney indicates poor airflow or improper combustion. This can be caused by chimney blockage or structural issues that require immediate attention.
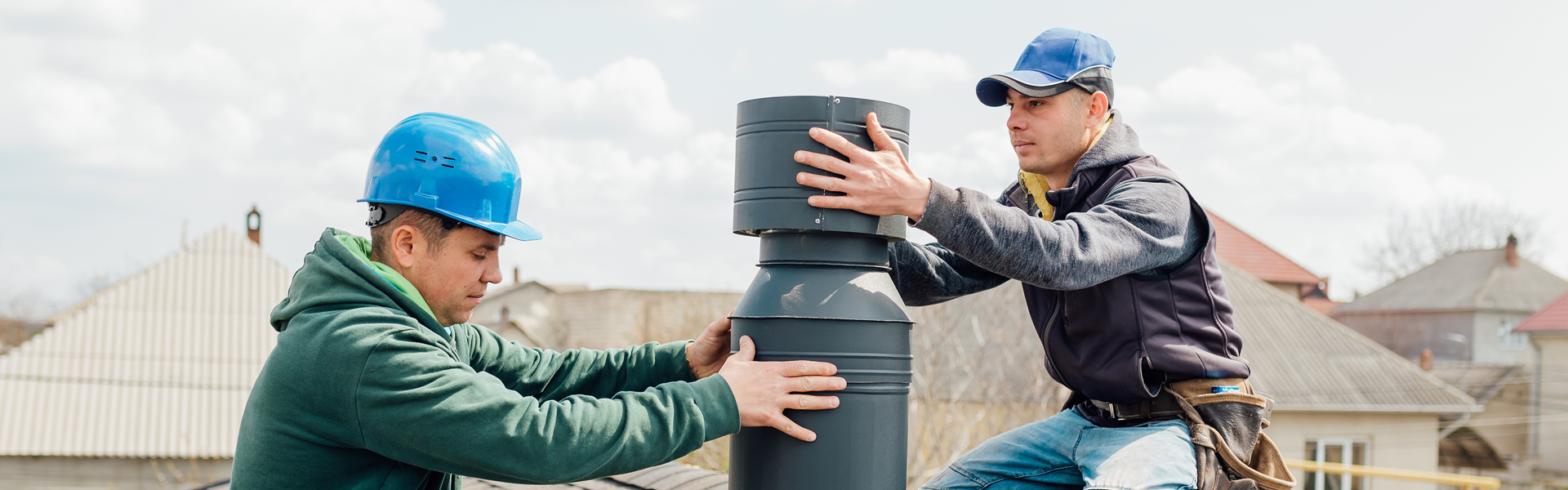
Step 2: Chimney Inspection
Before proceeding with any chimney repairs, it is crucial to have a professional chimney inspection. A thorough inspection by a qualified chimney expert can help uncover hidden issues and ensure the necessary repairs are targeted correctly. Here are some key reasons why chimney inspection is vital in the repair process:
Ensuring Safety and Compliance
Professional chimney inspections detect safety hazards and compliance issues like cracks, deterioration, or creosote buildup. This ensures your chimney meets safety standards and local regulations.
Identifying Hidden Damage
A trained inspector can detect hidden chimney damage, like cracks or issues with the liner, even if the chimney looks fine. Catching these early prevents costly repairs later.
Determining Repair Needs
A qualified inspector conducts a thorough inspection to pinpoint needed chimney repairs, addressing root causes for efficient solutions. Without this, you may only treat symptoms, not underlying issues.
Planning and Budgeting
A chimney inspection guides planning and budgeting by revealing repair needs, helping set realistic timelines and allocate resources. It also prioritizes urgent repairs for prompt attention.
Step 3: Cost considerations and budgeting
When it comes to chimney repairs, cost considerations play a crucial role in planning and budgeting for the process. Understanding the factors that influence the cost and having a clear budget can help you make informed decisions and ensure a smooth repair experience. Here are some key points to consider:
1. Scope of repair:
The extent of the repair needed will have a significant impact on the overall cost. Minor repairs, such as fixing cracks or replacing a chimney cap, are generally more affordable compared to extensive repairs involving chimney rebuilding or relining.
2. Size and height of the chimney:
Larger chimneys or those with multiple flues tend to require more materials and labor, leading to higher costs. Additionally, taller chimneys may require specialized equipment or scaffolding, which can further increase the expenses.
3. Material selection:
The choice of materials for chimney repairs can vary in terms of cost. For example, opting for stainless steel chimney liners may be pricier initially but can provide long-term durability and efficiency, whereas traditional clay liners may be more affordable but require more frequent maintenance.
4. Accessibility:
If your chimney is in a hard-to-reach location or requires special access equipment, it can add to the overall costs. Consider the accessibility factor when budgeting for chimney repairs.
Step 4: Selecting the Right Repair Method
Choosing the right chimney repair method is vital for restoring structural integrity. Understanding repair options helps make informed decisions. Here are some commonly used repair methods and how to choose the most suitable one for your chimney:
1. Tuckpointing
Tuckpointing replaces damaged mortar in chimneys with minor cracks. Skilled masons remove deteriorated mortar and replace it, improving both appearance and strength.
2. Chimney Relining
Chimney relining replaces damaged or deteriorated liners for safe ventilation. This involves installing a new liner, often stainless steel or cast-in-place, tailored to your chimney’s needs and fuel type.
3. Chimney Crown Repair or Replacement
The chimney crown protects the top of the chimney but can degrade over time, leading to water damage. Hiring a professional is essential for assessing and repairing or replacing the crown to prevent costly issues.
4. Flashing Repair or Replacement
Flashing, a thin metal material, shields the chimney-roof junction. When damaged or improperly installed, it can cause water leaks and structural damage. Repairing or replacing flashing includes removing the old material, inspecting for damage, and installing new flashing for a secure seal.
Step 5: Implementing Chimney Repairs
Implementing chimney repairs is a crucial step in the chimney repair process. Once you have identified the specific damage and have a plan in place, it’s time to roll up your sleeves and get to work. Here’s a step-by-step guide on how to implement chimney repairs effectively:
1. Gather the necessary tools: Before you start, make sure you have all the tools and materials required for the repair. This may include a chimney brush, mortar repair product, chimney cap, caulk, steel wool, and safety equipment such as gloves and goggles.
2. Safety first: Always prioritize safety when working on your chimney. Use a sturdy ladder and ensure the area around the chimney is clear of any obstacles. If the repairs involve using hazardous materials or working at heights, consider hiring a professional chimney repair service.
3. Clean the chimney: Begin by cleaning the chimney thoroughly to remove any debris, soot, or creosote buildup. Use a chimney brush to scrub the flue interior and remove any blockages that may hinder proper airflow.Carefully inspect the flue liner for any cracks or damage
Step 6: Maintenance and Prevention
To ensure the long-term health and efficiency of your chimney, it is essential to incorporate regular maintenance and preventive measures. By following these tips and recommendations, you can maintain the structural integrity of your chimney and prevent potential problems in the future.
Regular Chimney Inspections
Schedule annual chimney inspections by a professional to detect any hidden issues or early signs of damage. A thorough inspection will identify problems such as cracks, deterioration, or blockages that may require timely repair.
Proper Chimney Cleaning
Regular chimney cleaning removes creosote, debris, and soot, improving efficiency and reducing fire risk. Consider hiring a professional chimney sweep for thorough cleaning, especially with frequent fireplace or stove use.
Chimney Cap Installation
Installing a chimney cap is an effective preventive measure to keep out debris, rainwater, and animals. A chimney cap also helps prevent downdrafts and reduces the risk of sparks or embers escaping the chimney, ultimately protecting your home from potential fire hazards.
Step 7: The Importance of Hiring a Professional Chimney Repair Company
Safety: Professional chimney repair companies ensure that repairs are conducted safely, reducing the risk of accidents or injuries.
Expertise: Trained professionals have the knowledge and experience to accurately diagnose chimney issues and perform repairs effectively.
Quality Workmanship: Hiring professionals ensures high-quality repairs that meet industry standards, enhancing the longevity and functionality of your chimney.
Compliance: Professional chimney repair companies adhere to building codes and regulations, ensuring that repairs are done correctly and legally.
Time and Cost Efficiency: By hiring experts, you save time and money in the long run, as they can efficiently address issues and prevent further damage.
Peace of Mind: With professionals handling the repairs, you can rest assured that your chimney is in good hands, providing peace of mind for you and your family.
In conclusion, chimney repair stages encompass inspection, assessment, method selection, and implementation. Skilled professionals undertake these steps systematically, ensuring the restoration of chimney functionality and safety.With careful attention to each stage, chimney repair ensures optimal performance and longevity of the structure, providing homeowners with peace of mind.